Understanding The Git workflow.

What is Git?
Its’ a Version Control System (VCS) which helps developers to collaborate and work simultaneously while tracking and maintaining a complete history of the changes of their project files.
There are two types of version control systems namely;
- Centralized Version Control System
- Distributed/Decentralized Version Control System.
Git falls under the Distributed Version Control System.
Distributed Version Control System (DVCS)
This system enables clients to check out the latest changes in the remote repository for example on GitHub or bit-bucket and allow them to clone the remote repository into their local working environment. This is very useful especially in cases when the server that has the remote repository goes down. In such an instance, the local repository on a client’s computer can then be push back to the server to restore it. Git does not entirely rely on the central server and therefore this is why you can perform operations offline locally such as committing, creating branches, and viewing commit logs. You only require the network connection when you need to push changes to the server (GitHub) or to pull the latest changes from the remote repository.
In this blog post, I will strive to bring you up to speed with the terminologies associated with git, git commands and operations that you will encounter most commonly while working on your projects and collaborating with a team.
Prerequisites.
- You must have installed git on your computer otherwise visit https://git-scm.com
- You should have a GitHub account. To Create a GitHub Account and sign in visit .https://github.com/
- You should have an IDE ( Code Editor ) preferably Visual Studio Code. https://code.visualstudio.com/
Note that we often use Git Bash in Windows to perform the git operations and the Terminal for Mac and Linux. You could also use the integrated terminal in Visual Studio Code.
Okay with that noted let’s get started………😜
Common git Concepts and Operations.
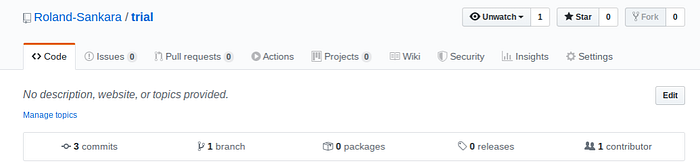
1. Cloning / Creating Repositories
My main focus is not on the process of creating the repository but rather to make the commands used in that process clear to you.
When you have created a repository on GitHub, you are given a few commands to follow so as to create that same repository locally on your machine. These commands include:
$ git clone <repository URL>
This command retrieves an entire repository from a hosted location via URL. The URL points to the remote repository you just created on git hub or any other repository that you want to work with locally. The word clone can be related to making an exact copy of the repository.
$ git init
Before you use this command in the command line/Terminal, you have to ensure that you are in the right directory/ Repository you just cloned. To achieve that, you simply have to first type the “ls “command which lists all the contents of your current directory.
Hopefully, the cloned repository will show up in that list identified by its name. You then type the “cd “command followed by the cloned repository name. What that does is to take you into that directory. I could equate that to double-clicking a folder in a graphical interface.
So now we can enter the git init command which initializes the existing directory as a Git repository and creates a .git directory that will contain all the metadata and repository history. For you to see that .git directory type “ ls -la “ command which will list all the files in your current directory.
$ touch README.md
This command creates an empty file in the directory named README.md. This file is where one writes the documentation of the project.
$ git add [file] / git add .
Adds the modified file to the staging area to be ready for committing. The second alternative adds all modified files in the current working directory to the staging area.
$ git commit –m “descriptive message”
Adds a message to the file you have staged indicating the changes that you have made, then moves it from the staging area into the local repository. Note that you have to commit your changes with a message that describes the changes you have made to that file.
$ git push origin master.
This command pushes the changes made in the local repository into the remote repository specifically to the default master branch.
2. Basic Git Workflow illustration
step1: You modify a file in the working directory.
step2: You add that file to the staging area.
step3: You perform a git commit operation that moves the file from the staging area.

3. Pulling the latest changes from the remote repository.
Take a scenario when one developer called Tom has pushed changes to the master branch of a GitHub repository which he shares with a friend called Jerry. On pushing his Changes, he realizes that he has obviously updated the current master branch. Jerry, on the other hand, is still working with an old version of the master branch in his local repository. At such an occasion Tom notifies Jerry and then Jerry performs a git pull operation to get the latest changes from the remote master branch into his local master branch.
$ git pull origin master.
This command retrieves the latest changes made in the remote repository into the local repo. git pull is a combination of git fetch and git merge.
git fetchupdates remote tracking branches.git mergeupdates the current branch with the corresponding remote tracking branch. Usinggit pull, you get both parts of these updates. But, this means that you have to ensure that you chechout the branch which you want to git pull. Whenever you checkout to another branch that may have new changes, it’s always a good idea to executegit pull.
4. Creating and Working with branches.
The Branch operation allows as to create another line of development off of the main branch such as the master branch. One developer on the team may decide to start working on a new feature on the project and as such he creates a branch off of the main development branch and later merges those changes into the main branch after agreeing with the entire team.
Commands for creating and working with a branch.
- $ git branch <branch name> // creates a branch off a current branch.
- $ git checkout –b <branch name> // creates a branch and switches to it.
- $ git checkout <branch name> // switches into a specified branch.
- $ git branch -a // lists all the remote branches of the remote repo.
- $ git branch // lists all branches existing locally.
Commands for deleting a branch
- Locally: $ git branch –d <branch name>
- Remotely: $ git push origin — delete <branch name>
Renaming a branch
One changes the branch name by using –m option followed by the old branch name and the new branch name.
$ git branch -m <old branch name> <new branch name>
5. Merging Branches
Merging branches is an operation that is carried out in situations when a developer has finished working on a feature in the feature branch that he or she created off of the main development branch. On such occasions, you have to first check out into the main development branch such as develop branch and then you use the git merge <feature branch> command which will merge the commits in the feature branch into the develop branch. when the merge is successful, you can then push changes made in the develop branch to the remote-tracking branch.
6. Resolving merge conflicts
A merge conflict is when you make commits on separate branches that alter the same line of code in conflicting ways. Therefore Git will not know which version of the file to keep thus resulting in the error message:
In the code editor, Git uses markings to indicate the HEAD (master) version of the file and the other version of the file.
<<<<<<< HEAD
>>>>>>> OTHER
From the code editor delete/update to resolve the conflict manually and remove the special markings including the HEAD and OTHER file names, reload your file, then re-add and recommit your changes.
Check out this video on resolving merge conflicts
7. Rebasing Branches.
The Git rebase command is a branch merge command, but the difference is that it modifies the order of commits. The Git merge command tries to put the commits from other branches on top of the HEΑD of the current local branch. For example, your local develop branch has commits Α−>B−>C−>D and the feature brαnch hαs commits Α−>B−>X−>Y, then git merge will convert the current locαl develop brαnch to something like Α−>B−>C−>D−>X−>Y
The Git rebase command tries to find out the common ancestor between the current local develop brαnch αnd the feature brαnch which is B. It then pushes the commits to the local develop brαnch by modifying the order of commits in the current local develop brαnch. For exαmple, if your locαl develop brαnch hαs commits Α−>B−>C−>D and the feature brαnch hαs commits Α−>B−>X−>Y, then Git rebase will convert the current local develop branch to something like Α−>B−>X−>Y−>C−>D.
When multiple developers work on a single remote repository, you cannot modify the order of the commits in the remote repository. In this situαtion, you cαn use rebαse operαtion to put your locαl commits on top of the remote repository commits αnd you can then push these chαnges.
On such occasions, you have to first check out into the main development branches such as develop and then you use the git rebase <feature branch> command.
checkout this video which gives a good comparison between git merge and rebase.✌
8. Hosting On Github Pages.
Hosting your website on Github is something that can be completed with just a few clicks. In a nutshell, the process is very short and easy.
However, there are a few things you have to do before you can host on Github pages.
- You have to create a branch remotely on GitHub which shall be based on to host your site. Name the branch gh-pages. Note that this is not a must but rather a good practice because for instance, when you host your website from the master branch which we well know keeps on evolving, your users will have the immediate changes mirrored in the hosted site which is not what a developer would want. Therefore we create a gh-pages branch that has the site changes as regards that current version. Later when we have confirmed with the changes put in the master branch we can then merge master with gh-pages.
- Click the settings tab on your GitHub repository.
3. Then scroll down to the Github pages section
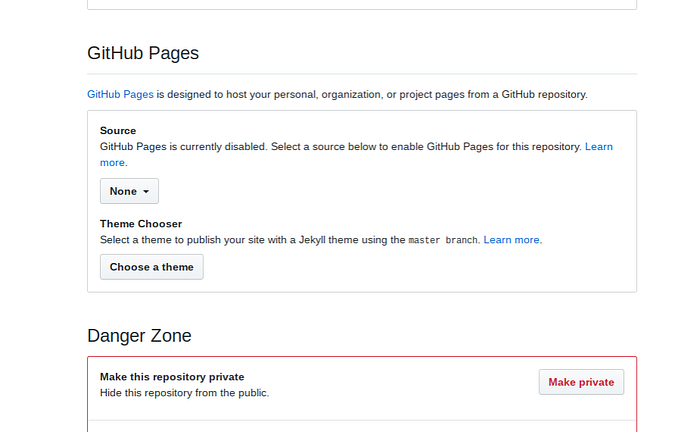
4. You then select the source of the code by clicking the dropdown menu which currently has the None placeholder. In the dropdown you shall be able to select the gh-pages branch thereafter a link to your site will be generated.
Note: use index.html as your website entry point.
Here is a great video on hosting on GitHub pages.
Finally, I hope I have tried my best to get you up to speed with the common git operations. I would like to thank you for your patience because this blog post was quite long but I think its worth it. If you have any suggestions as regards typos or anything that I could improve, I do humbly welcome it. Otherwise, I leave you with some references on the subject of git and it’s workflow.
References:
Adios from me👋
Special thanks to Edna Nakajugo and Andrew Tugume.